I am a secondary school & A-level Science teacher, specialising in Biology. I am also an experienced AQA GCSE Biology Examiner. My resources contain a mix of Biology, Chemistry and Physics lessons aimed at meeting specification points for the new AQA Trilogy GCSE course and KS3 Activate course.
All of my lessons include at least one opportunity for self-assessment, a range of activities to suit students of all abilities, a set of differentiated starter questions and a plenary.
This lesson is designed for the KS3 Year 8 Science course, specifically the P2 1.1 unit on ‘Electricity & Magnetism’.
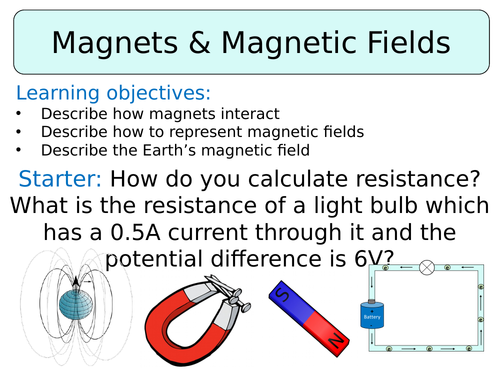
The lesson begins with a question for pupils to ‘Think > Pair > Share’ their ideas about what they already know about magnets. This can be discussed in a group, before feeding back to the classroom. Students will now complete a practical investigation: testing magnetic materials, in groups they will be given a selection of materials and a bar magnet, they will need to determine which materials are magnetic. Once complete, students can check their work against the answers provided.
Next, students will investigate what happens when the poles of two bar magnets are brought together. Students will be given a set of combinations to try: N + N, S + N, S + S - attract or repel? Their results can be recorded in a table in their books and then be assessed using the mark scheme once complete.
The next part of the lesson focuses on magnetic fields; firstly, students are shown the magnetic field of a bar magnet. They will have a go at drawing their own - they will have a worksheet, on it is lots of of circles surrounding a bar magnet, on each of the circles they will place a compass and then draw the direction the arrow is facing. Once complete, students should link up the arrows to show the direction of the magnetic field, they can stick this worksheet into their books.
The last part of the lesson focuses on the magnetic field surrounding Earth, students are shown diagrams to demonstrate this idea and then will assess their knowledge of the subject by getting students to complete a fill-in-the-blanks task. This task can be self-assessed using the mark scheme provided in the PowerPoint presentation.
The plenary task requires students to summarise what they have learned this lesson in three sentences.
All resources are included at the end of the presentation, thanks for looking, if you have any questions please let me know in the comments section and any feedback would be appreciated :)
This lesson is designed for the KS3 Year 8 Science course, specifically the P2 1.1 unit on ‘Electricity & Magnetism’.
This lesson begins with an introduction to current & charge, students are provided with the definition for current and told that an ammeter is the component used to measure current, in amps. Students will then watch a short video on current, during which they will need to answer a couple of questions. Students can mark their work once this is complete.
Students are then told the role of the battery in the circuit, as the store of energy which provides the push which gets the current flowing, pushing the charge around the circuit.
Next, students are introduced to electrical circuit diagrams, they are firstly shown a simple circuit diagram and are asked to label the components indicated from a list of key words: switch, battery and bulb. After students have drawn the circuit and had a go at labelling it, the answers can be revealed so they can mark and assess their work.
Students are now given a set of instructions to draw 4 different circuit diagrams, the answers to this task are included in the PowerPoint so students can self-assess their work using the mark scheme provided.
Lastly, students will complete a task which requires them to match sentences starters to the correct sentence enders, to assess their knowledge of what they have learned this lessons. This task can then be either self-assessed or peer-assessed using the mark scheme provided.
All resources are included at the end of the presentation, thanks for looking, if you have any questions please let me know in the comments section and any feedback would be appreciated :)
This lesson is designed for the Activate KS3 Science Course, specifically Year 7 P2 ’Sound’.
For more lessons designed for KS3 and KS4 please visit my shop at: /teaching-resources/shop/SWiftScience.
The lesson starts with a definition of an ‘echo’ and how echoes can be produced by ship via sonar and by baby scanners via ultrasound. Students will then consider the ways in which echoes can be reduced and why this might be important in places such as theaters, concert walls & recording studios.
The first activity involves students using a range of materials (tissue paper, cardboard, cotton wool, bubble wrap, paper, plastic) to soundproof a margarine tub, which will hold a buzzer and a decibel meter. Each group can test how well they have soundproofed their margarine tub, perhaps a prize for the best one! Once this has been complete students can write an evaluation for their practical, they will need to consider which part of their practical were carried out well , how the findings could be improved and what they would do differently if it was done again.
Next, students will be given a piece of information on ‘Ultrasound’ - using this they will need to answer a set of questions in their books. This task can be self-assessed using the mark scheme provided in the books.
The last task is a crossword on ‘Sound’, students should use knowledge of that they have learned over the course of the topic on sound to answer the clues and complete the crossword. The task can be assessed using the mark scheme provided.
The plenary requires students to complete one of the selection of sentence starters to summarise what they have learned so far this lesson.
All resources are included at the end of the presentation. Thanks for looking, if you have any questions please let me know in the comments section and any feedback would be appreciated :)
This lesson is designed for the KS3 Year 8 Science course, specifically the P2 1.1 unit on ‘Electricity & Magnetism’.
This lesson begins with an introduction to potential difference, students will watch a couple of minutes of a video and whilst watching will need to answer a set of questions. This task can then be self-assessed using the mark scheme provided on the PowerPoint presentation.
Next, students will be shown a circuit diagram, with two voltmeters connected - one parallel to a cell and one parallel to a light bulb. Students are asked to ‘Think > Pair > Share’ their ideas about whether the potential difference is higher across the battery or across the cell. Students will then carry out an investigation to find the answer the this question.
After this, students will complete a fill-in-the-blank task to summarise what they have learned so far this lesson. Once complete student can self-assess or peer-assess their work using the mark scheme provided.
Lastly, students will be given a set of questions relating to potential difference and also resistance, students will need to use what they have learned this lesson as well last lesson on resistance to complete these questions. This task can then be marked and assessed using the mark scheme provided. This is followed by a very quick anagram challenge, students will need to unscramble the anagrams to spell 6 key words related to the topic of electricity, students can write a definition for each key word if they have finished.
The plenary requires students to write a twitter message, summarising what they have learned this lesson, including #keywords.
All resources are included at the end of the presentation, thanks for looking, if you have any questions please let me know in the comments section and any feedback would be appreciated :)
This lesson is designed for the NEW AQA Trilogy Physics GCSE, particularly the 'Molecules & Matter ’ SoW.
For more lessons designed to meet specification points for the NEW AQA Trilogy specifications for Biology, Chemistry and Physics please see my shop: /teaching-resources/shop/SWiftScience
This lesson begins with a definition of density as well as the calculation (and units) for density. Students can take notes using the PowerPoint presentation and then work through the worked example on the board, before the answer to this question is revealed. Students will now need to rearrange the equation in order to calculate either the mass of the object or the the volume of the object.
Students will now copy and complete a table on the different densities of materials, using the equations written in their books they will need to calculate the mass/volume/density of these materials. The mark scheme for this work is included in the PowerPoint presentation so students can self-assess their work once it is complete.
Students will now focus on the ‘Maths Skill’ of converting units into standard form, an example if first given to students before they work through a set of numbers - converting to standard form. Students can self-assess their work using the answers provided once this is complete.
Students will now work their way through a set of questions, some ‘exam-style questions’ on density. Students must show all their working, the mark scheme for these questions is included in the PowerPoint so students can self-assess their work once it is complete.
The next part of the lesson demonstrates to pupils how they can work out the density of a solid object with an irregular shape, as well as the density of an unknown liquid. Students are shown the steps needed to calculate the density of these substances, they will then be given a set of problems to work through. Once complete students can self-assess their work using the mark scheme provided.
The final two tasks are firstly a past-paper exam question and then a ‘True or False’ activity - both to assess students knowledge of what they have learned this lesson.
The plenary task requires pupils to write down three sentences to summarise what they have learned this lesson.
All resources are included at the end of the presentation. Thanks for looking, if you have any questions please let me know in the comments section and any feedback would be appreciated :)
This lesson is designed for the NEW AQA Trilogy Physics GCSE, particularly the 'Molecules & Matter’ SoW.
For more lessons designed to meet specification points for the NEW AQA Trilogy specifications for Biology, Chemistry and Physics please see my shop: /teaching-resources/shop/SWiftScience
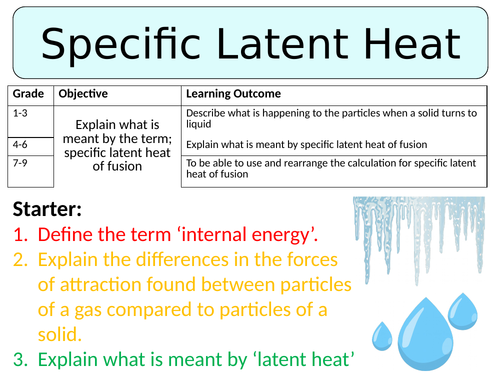
This lesson begins with a recap on ‘Latent Heat’, including a definition and task which requires students to sketch a temperature-time graph of ice which has been taken out of the freezer and heated at a constant rate for a period of time. They will then need to match a set of statements to stages shown on the graph, this task will then be self-assessed using the mark scheme provided.
Students are then introduced to the idea of ‘Specific Latent Heat of Fusion’ - firstly students are given a description of what this tells us about a substance and then also the calculation. Students can take notes on this in their books, the next task then requires students to rearrange the equation they have been given to work out either energy (J) or mass (kg). Once students have discussed their ideas, the answers can be revealed and then pupils can work their way through a set of problems. This work can then be self-assessed using the mark scheme included in the PowerPoint.
The next part of the lesson now focuses on ‘Specific Latent Heat of Vaporisation’ - students are again given a description of what this tells us about a substance and also the calculation is provided. Students can take notes and also try to rearrange the equation in order to make energy or mass the subject. Students can discuss their ideas, the answers are revealed and they will then use these calculations to work their way through a set of problems.
Lastly, students will watch a video and will need to answer a set of questions whilst watching, this work can be checked against the answers provided. Then the very last task is a past-paper question on the topic, students can self-assess or peer-assess their work on this topic.
The plenary requires pupils to write a WhatsApp message to a friend, explaining what they have learned this lesson.
All resources are included at the end of the presentation. Thanks for looking, if you have any questions please let me know in the comments section and any feedback would be appreciated :)
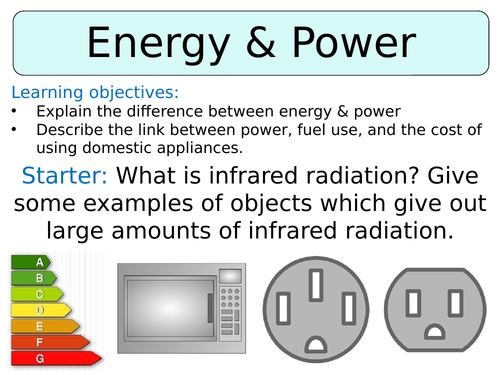
This lesson is designed for the KS3 Year 8 Science course, specifically the P2 1.2 unit on ‘Energy’.
More Biology, Chemistry and Physics resources can be found in my TES Shop: /teaching-resources/shop/SWiftScience
This lesson starts with a discussion on what power is a measurements of, there are hints that can be put on the board for lower ability students. You can then provide students with a definition of power which they can write down in their books.
Pupils then consider the units of power, they can copy and complete sentences on the board which compare watts to joules/second and the difference between watts and kilowatts, joules and kilo joules.
Next is the completion of a formula triangle in their books, higher ability students can figure out how to write this on their own but for lower ability students you may want to guide them through it. The concept of power is then put into context using Mo Farah/Usain Bolt as examples (videos provided).
The next task is a table that students will need to copy off the board, it outlines different appliances and pupils will have to perform calculations to fill in the blanks. Pupils can self-assess their work using red pens, answers are provided on the PowerPoint slide.
Next, students will complete a ‘copy and complete’ task, students will need to fill in the blanks to complete a paragraph which summarises everything that they have learned throughout the course of this lesson. The answers to this task can be self-assessed using the mark scheme provided.
The last part of the lesson focuses on electricity bill calculations, using the units kWh. Students will be shown a worked example of a calculation to demonstrate how much energy (in kWh and Joules) is used by a laptop over the course of one hour. Students will then compete a set of problems similar to this, they can self-assess their work using the mark scheme once this task is complete.
The plenary task requires students to write a Whatsapp message to a friend to summarise what they have learned this lesson.
All resources are included at the end of the presentation, thanks for looking, if you have any questions please let me know in the comments section and any feedback would be appreciated :)
This lesson is designed for the NEW AQA Trilogy Physics GCSE, particularly the 'Electricity’ SoW.
For more lessons designed to meet specification points for the NEW AQA Trilogy specifications for Biology, Chemistry and Physics please see my shop: /teaching-resources/shop/SWiftScience
The lesson starts with an introduction into the differences between series and parallel circuits, students can take notes and draw a diagram of each type of circuit in their books. Students will then watch a video on series and parallel circuits, they will need to answer a set of questions in their books which focuses on how current and potential difference across components changes in a series vs. parallel circuit. Once this task is complete, students can then self-assess their work using the mark scheme provided.
Next, pupils have to identify whether a circuit is a series circuit or a parallel circuit from a set of diagrams. Then, students are given a worksheet of parallel and series circuits, given the current of the ammeter shown in the diagram they will need to work out the current of the ammeters placed elsewhere in the circuit. Students can then self or peer assess their work using the mark scheme provided.
The next part of the lesson focuses on the resistance of components found in series and parallel circuits. Firstly, students will be given the ‘Resistance Rule’ for components in a series circuit, as well as the calculation to work out total resistance in a series circuit. Using this, students can then answer some questions which can be self-assessed using the mark scheme provided.
Next, pupils are introduced to the ‘Resistance Rule’ for components placed in a parallel circuit. Once they have learned the rules, pupils can answer a set of questions which can then be either peer-assessed or self-assessed using the mark scheme provided.
The plenary task is a ‘Pick a plenary’ task - students can either summarise what they have learned this lesson in three sentences or they can write a definition for a set of key words from the ‘Electricity’ topic.
All resources are included at the end of the presentation. Thanks for looking, if you have any questions please let me know in the comments section and any feedback would be appreciated :)
This lesson is designed for the NEW AQA Trilogy Physics GCSE, particularly the 'Electricity’ SoW.
For more lessons designed to meet specification points for the NEW AQA Trilogy specifications for Biology, Chemistry and Physics please see my shop: /teaching-resources/shop/SWiftScience
The lesson begins with an introduction to the differences between alternating and direct current, demonstrate with a diagram and a video. Students will then watch another video, using which they will answer a set of questions about alternating current, direct current and the use of oscilloscopes. Once this task has been completed students can self-assess their work using the mark scheme provided in the power point presentation.
The next task will require pupils to read a set of information about wiring within three-pin plugs before sketching a diagram of the plug and completing a table to summarise the colour and roles of the live, neutral and earth wires. Again, this work can be self-assessed using the mark scheme provided. Students will then need to sketch a diagram of an oscilloscope trace from an a.c. and d.c. supply and provide some notes about what these two traces are showing us.
The next part of the lesson will focus on the National Grid, firstly students will observe a simplified diagram of the route taken by an electric current from the power station to people’s homes, this route involves the electric current passing through a step-up and step-down transformer. Students will need to watch a video and then summarise the role of these two types of transformers. This task can be self-assessed against the answer provided in the PowerPoint presentation.
Next, the PowerPoint presentation explains why it is important to keep the voltage in the overhead cables very high and the current very low - to reduce resistance. Students will then need to complete a fill-in-the-blank task to sum up the main points about the National Grid.
The last part of the lesson will require pupils to observe oscilloscope traces for different a.c. supplies, firstly they will be shown how to work out the period, they will need to apply this to each oscilloscope trace. Then using the period, they will need to calculate the frequency for each trace - making sure they show all their working! Once this task is complete pupils can self or peer assess their work using the mark scheme provided.
The plenary task is an exit card, students are asked to write down three facts they have learned during the lesson, five key words and one question to test their peers knowledge.
All resources are included at the end of the presentation. Thanks for looking, if you have any questions please let me know in the comments section and any feedback would be appreciated :)
This lesson is designed for the NEW AQA Trilogy Physics GCSE, particularly the 'Electricity’ SoW.
For more lessons designed to meet specification points for the NEW AQA Trilogy specifications for Biology, Chemistry and Physics please see my shop: /teaching-resources/shop/SWiftScience
The lesson begins with a video on electrical current and charge flow, students will need to answer a set of questions whilst they are watching the video. This work can then be self-assessed using the mark scheme provided.
Next, is a ‘Quick Check’ task where students will need to answer a set of questions using the calculation for rate of charge flow. Students will need to show their working for each of these questions, the answers are provided on the PowerPoint presentation so students can check their work against the mark scheme, making corrections where needed.
Next, the lesson introduces the formula for calculating the energy transferred to components within a circuit. Students can take notes using the PowerPoint presentation and then using the formula they should work their way through another ‘Quick Check’ task. The mark scheme for this task is also included in the PowerPoint presentation for pupils to self or peer assess their work.
The final part of the lesson focuses on energy transfers within a circuit. Firstly, a worked problem is shown to students before they have a go at working their way through another ‘progress check’, using knowledge of what they have learned so far this lesson.
The plenary task requires pupils to write a twitter message about what they have learned in the lesson, this must include #keywords!
All resources are included at the end of the presentation. Thanks for looking, if you have any questions please let me know in the comments section and any feedback would be appreciated :)
This lesson is designed for the NEW AQA Physics GCSE, particularly the ‘Radioactivity’ SoW.
For more lessons designed to meet specification points for the NEW AQA Trilogy specifications for Biology, Chemistry and Physics please see my shop: /teaching-resources/shop/SWiftScience
This lesson starts with a video about the developments in the atomic model starting from Greek philosophers to 20th Century scientists. Pupils are given a set of questions to answer whilst watching the video, this work can be self-assess using answers provided.
Next, pupils are given a set of cards with bits of information about different scientists involved in the development of the model of the atom. Pupils should put these cards in order and then use the information on the cards to formulate a timeline in their books, they should use the information on the cards to add labels describing the work of each of the scientists.
Students will now be shown a video on ‘Scattering Experiments & the Development of the Nuclear Model’ - students will need to answer a set of questions whilst watching the video. The answers to the video are included in the PowerPoint so students can self-assess their work once it is complete.
A diagram of the ‘Gold Foil Experiment’ is then shown to pupils, along with a summary of conclusions drawn from this investigation. Students will then be given a worksheet to complete, summarising the findings of this investigation and how it contributed to the development of the Nuclear Model of the atom. The mark scheme to this task is also included in the PowerPoint for pupils to assess their work.
The plenary task is a word search, students will need to find a list of key words on the topic of ‘radioactivity’.
All resources are included at the end of the presentation. Thanks for looking, if you have any questions please let me know in the comments section and any feedback would be appreciated :)
This lesson is designed for the NEW AQA Physics GCSE, particularly the ‘Radioactivity’ SoW.
For more lessons designed to meet specification points for the NEW AQA Trilogy specifications for Biology, Chemistry and Physics please see my shop: /teaching-resources/shop/SWiftScience
This lesson begins with an image of two atoms - one with less neutrons in the nucleus and one with more. Students are asked to ‘Think > Pair > Share’ their ideas about what make the atoms different from one another.
Next, students will be given a set of questions which they will need to answer whilst watching a video. The students will complete this task and once finished they will be able to mark their work using a the mark scheme that is provided on the PowerPoint presentation.
Students are now introduced to the idea of radioactive decay, students will be shown another video about ionising radiation. They will need to answer a set of questions whilst watching the video, the work can be self-assessed using the mark scheme available.
The latter part of the lesson focuses on the properties of alpha, beta and gamma radiation. Posters of information will be posted around the room, students will need to read this information and use this to answer a set of questions. The mark scheme is included so students can mark and correct their work.
The last task requires students to determine the number of protons and neutrons found within radioactive sources which have undergone alpha/beta decay. Students can then mark their work once it is complete.
The plenary task is for students to write a twitter message to demonstrate what they have learned today, making sure they #keywords.
All resources are included at the end of the presentation. Thanks for looking, if you have any questions please let me know in the comments section and any feedback would be appreciated :)
This is a resource designed to meet specification points for the NEW AQA GCSE Physics module on ‘Energy’.
Other lessons of this series can be found in my TES Shop:
/teaching-resources/shop/SWiftScience
It begins with a discussion on what power is a measurements of, there are hints that can be put on the board for lower ability students. You can then provide students with a definition of power which they can write down in their books.
Pupils then consider the units of power, they can copy and complete sentences on the board which compare watts to joules/second and the difference between watts and kilowatts, joules and kilo joules.
Next is the completion of a formula triangle in their books, higher ability students can figure out how to write this on their own but for lower ability students you may want to guide them through it. The concept of power is then put into context using Mo Farah/Usain Bolt as examples (videos provided).
The next task is a table that students will need to copy off the board, it outlines different appliances and pupils will have to perform calculations to fill in the blanks. Pupils can self-assess their work using red pens, answers are provided on the PowerPoint slide.
The final activity is a worksheet pupils can complete on power, again the answers to this worksheet is provided within the PowerPoint slide for pupils to self-assess the work.
Plenary activity requires pupils to state three key facts from the lesson, 2 key words and pose a question to their peers on the topic of power.
All resources are included in the PowerPoint slide. Thanks & enjoy :)
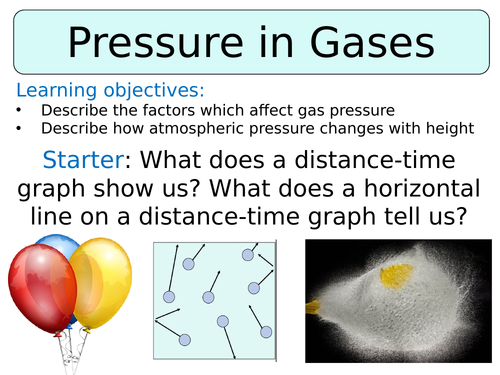
This lesson is designed for the KS3 Year 8 Science course, specifically the P2 1.2 unit on ‘Motion & Pressure’.
More Biology, Chemistry and Physics resources can be found in my TES Shop: /teaching-resources/shop/SWiftScience
The lesson begins with a demonstration - the collapsing can. Students should hopefully be able to identify that the can that collapsed had a lower pressure inside the can than outside the can, causing the can to collapse inwards.
This leads into a description of gas pressure, including a diagram to help demonstrate the concept. Students will now ‘Think > Pair > Share’ their ideas about what could cause an increase in pressure, after a short discussion the answers will be revealed to students - increasing the number of particles and increasing the temperature or reducing the size of the particles.
Students will now complete a task based upon what they have learned so far this lesson, this can be self-assessed using the mark scheme provided.
Students will now complete an investigation called ‘What makes a ball bouncy?’. Students will investigate whether a ball becomes more bouncy the more/less pumps of air it has in it. Students will copy the table of results into their books, draw a graph of their results and complete analysis questions. This task can be self-assessed once complete.
Lastly, students are introduced to the idea of atmospheric pressure and shown a diagram which represents the density of air particles at the top of the mountain compared to the bottom.
The plenary task requires students to complete one of the sentence starters in their books to summarise what they have learned this lesson.
All resources are included at the end of the presentation, thanks for looking, if you have any questions please let me know in the comments section and any feedback would be appreciated
This lesson is designed for the Activate KS3 Science Course, specifically Year 7 P3 ’Light’.
For more lessons designed for KS3 and KS4 please visit my shop at: /teaching-resources/shop/SWiftScience.
The lesson begins by students being shown a video of a laser show, students will need to note down their observations about how light travels. Hopefully students should identify that light travels in straight lines - a diagram can be shown to students to identify this. Students are also shown a diagram which demonstrates how shadows are formed.
Next, students will be given the definition of a luminous and non-luminous object. Students will need to come up with their own examples of luminous and non-luminous objects and write their ideas down into their books, under two headings. This task can then be self-assessed using the mark scheme provided, as well as other suitable suggestions.
Students will now be shown some pictures of objects which are either opaque, transparent or translucent, students should now ‘Think > Pair > Share’ their ideas about how to group these images. Hopefully, students should identify the three categories, this will be revealed as part of a class discussion. Students will now be given some time to come up with their own definitions for the terms: opaque, transparent and translucent and should come up with their own examples. This task can then be self-assessed using the mark scheme provided.
The next part of the lesson focuses on the speed of light, students will be given the speed of light and will be introduced to terms such as light-second, light-minute and light-year. Students will then be asked a question ‘What travels faster - light or sound? Give examples as evidence’. Students can discuss in pairs, writing their ideas down in their books. This can then be self-assessed using the mark scheme provided.
The last task requires students to complete a ‘Progress Check’ - students will fill in the blanks to complete a paragraph of information summarising what they have learned today. This work can be marked and corrected once complete. Lastly is a true or false activity which students can either complete in their books or using mini whiteboards.
The plenary task requires students to complete an ‘Exit Card’ to summarise three things they have learned, five key words and one question to their peers.
All resources are included at the end of the presentation. Thanks for looking, if you have any questions please let me know in the comments section and any feedback would be appreciated :)
This lesson is designed for the Activate KS3 Science Course, specifically Year 7 P3 ’Light’.
For more lessons designed for KS3 and KS4 please visit my shop at: /teaching-resources/shop/SWiftScience.
This lesson begins with an explanation of how the different parts of the eye work together in order for you to see objects. The functions of different parts of the eye are briefly explained. Students will then need to complete a task to assess their knowledge of this introductory information, this can be self-assessed using the mark scheme provided.
This leads onto another task which looks at the function of different parts of the eye, students will each be given a different piece of information outlining the function of one part of the eye. Students will then need to walk around the room, sharing information with each other to complete a table on the functions of eye parts. This task can be marked using the answers provided.
Students will then be shown an image of a pinhole camera, they will need to sketch a copy of it into their book. They are then asked a few questions which looks at the similarities between a pinhole camera and the eye, students should answer these questions in their books and once complete they can mark their work using the answers provided.
Students are then provided with some information comparing the structure and function of eyes compared to a digital camera. Students will need to outline one way in which they are similar and one way in which they are different, this task can also be assessed using the answers provided.
Lastly, the plenary task requires students to write down three sentences to summarise what they have learned this lesson.
All resources are included at the end of the presentation. Thanks for looking, if you have any questions please let me know in the comments section and any feedback would be appreciated :)
This lesson is designed for the Activate KS3 Science Course, specifically Year 7 P1 ’Forces’.
For more lessons designed for KS3 and KS4 please visit my shop at: /teaching-resources/shop/SWiftScience.
The lesson begins with a recap activity, students will need to sort a list of forces into two categories: contact and non-contact forces. This task can the be self-assessed using the mark scheme provided.
Next, students will recap on the non-contact forces that they have already learned about: gravitational forces, magnetic forces & electrostatic forces. Students will the be asked ‘What is a Force Field’ - they will then need to ‘Think > Pair > Share’ their ideas. After a short class discussion, the answer can be revealed to students and they could take notes on this in their books.
Students will carry out an investigation which helps them to visualise the force field which surrounds a magnet. Students will place small compasses at pin-point positions surrounding a bar magnet. They will need to draw an arrow to represent the direction that each compass is facing, lines can be drawn between each position which will show the overall force field of the bar magnet. This task can be self-assessed using the mark scheme provided on the PowerPoint.
Next, students are told the difference between weight and mass, they are also given the calculation for the weight of an object when you are given the gravitational field strength of the planet the object is found on, plus the mass of the object. Using this calculation students will then need to complete a set of questions on weight & mass, once complete students can self-assess their work using the mark scheme provided.
The last task is a ‘Progress Check’ task, whereby students will copy and compete the paragraph of information to summarise what they have learned this lesson.
The plenary task requires students to write a twitter message to sum up what the students have learned in the lesson, they will need to try to #keywords.
All resources are included at the end of the presentation. Thanks for looking, if you have any questions please let me know in the comments section and any feedback would be appreciated :)
This lesson is designed for the KS3 Year 8 Science course, specifically the P2 1.2 unit on ‘Motion & Pressure’.
More Biology, Chemistry and Physics resources can be found in my TES Shop: /teaching-resources/shop/SWiftScience
The lesson begins with an introduction to moments, by using a door opening by it’s hinges as an example. Student are shown an animation of a man trying to push a door open close to the hinges and far from the hinges of the door, demonstrating it is easier further from the hinges. Students are then introduced to the calculation - moment = force x distance from the pivot.
Students are then shown a worked example using the calculation, before being presented with a problem to solve themselves. Next, students are shown a diagram of a man pushing down on one side of a see saw, at the other side is a bag of money. This diagram is labeled to show the effort force, pivot and load.
Students are then given a worksheet on levers, students will need to identify the effort force, pivot and load in each of the diagrams and also match the key words to the correct definition. This work can be self-assessed using the mark scheme provided once it is complete.
The last two tasks are assessment tasks, firstly students will copy and complete the paragraph, using the key words provided, to summarise what they have learned this lesson. This can then be self-assessed using the mark scheme provided. Lastly, students are presented with a set of moment problems, using the calculation they learned at the beginning of the lesson students will need to work through these calculations. The mark scheme for this task is also included so students can self-assess or peer-assess their work.
The plenary task requires students to spend a minute talking to the person next to them about what they have learned this lesson.
All resources are included at the end of the presentation, thanks for looking, if you have any questions please let me know in the comments section and any feedback would be appreciated
This is a resource aimed at the NEW GCSE Physics specification on ‘Energy’.
Other lessons from this series can be found in my TES Shop: /teaching-resources/shop/SWiftScience
The lesson begins by considering objects with elastic potential energy stores. The calculation for the elastic potential energy store of an object is introduced and pupils can have a go at rearranging it themselves. **If lower ability - you can go through this on the board**
Pupils then copy and complete the table which leads them through the different stages to this calculation, they can then self-assess their work using a red pen.
The next two slides are questions pupils can complete to work out the elastic potential energy stores of various objects, these questions can be self-assessed.
The final activity is a past-paper question task (worksheet provided at the end of the PowerPoint) whereby pupils complete the questions, pass to their peers and peers will mark the work using the mark scheme provided on the PowerPoint. Peers should provide a positive comment, negative comment and something to improve.
All resources for this lesson are included at the end of the PowerPoint presentation.
Thanks & enjoy :)
This bundle contains 57 whole lessons, along with all additional resources, which meet all learning outcomes within the complete Year 7 Activate Course, units include:
Biology:
B1.1 Cells
B1.2 Structure & Function of Body Systems
B1.3 Reproduction
Chemistry
C1.1 Particles & Their Behaviour
C1.2 Elements, Atoms & Compounds
C1.3 Chemical Reactions
C1.4 Acids & Alkalis
Physics
P1.1 Forces
P1.2 Sound
P1.3 Light
P1.4 Space
The resources were designed with the Year 7 Activate course in mind, it contains over 24 weeks worth of lesson content!! You can find more lesson bundles aimed for the KS3 and KS4 science curriculum at: /teaching-resources/shop/SWiftScience
All lessons contain a mix of differentiated activities, videos & animations, progress checks and more than two opportunities, per lesson, for self/peer red-pen assessment of tasks!