Welcome to Resourceful Mind! Through my extensive experience in teaching design, engineering, graphics, food and textiles, I've developed resources that make topics easy to understand. My materials include clear visuals, simple explanations, and engaging tasks to reinforce learning and support learners.
Welcome to Resourceful Mind! Through my extensive experience in teaching design, engineering, graphics, food and textiles, I've developed resources that make topics easy to understand. My materials include clear visuals, simple explanations, and engaging tasks to reinforce learning and support learners.
Btec Engineering Learning Aim A Blended wing bodies
A powerpoint presentation that includes a starter, introduction, main activity, video links, task and plenary for this learning aim
Btec Engineering Learning Aim A Bionics
A powerpoint presentation that includes a starter, introduction, main activity, video links, task and plenary for this learning aim
Btec Engineering Learning Aim A Drilling
A power point presentation with starter activity, notes, video links, tasks and plenary that cover this learning aim
Btec Engineering Learning Aim A Casting and forging
A power point presentation with starter activity, notes, video links, tasks and plenary that cover this learning aim
An assembly I gave on New Years resolutions looking at why changes are better than resolutions.
You will need to change the first couple of slides to add your own example of your resolution to tailor it for you but the rest offers information on why we fail, what is a better alternative to resolutions and how to think SMART about targets for change.
One of lesson explaining the effects of emerging technology.
The lesson helps students identify the positive and negative effects and the prepares them for GCSE exam questions.
The lesson contains exam style questions and explains how to access the low and high marks.
Contains
Starter
Main lesson
2 Tasks
Exam question mark breakdown
6 exam questions from 1 - 6 marks
Exit card
Follows on from emerging technology lesson on technology push, market pull and consumer choice.
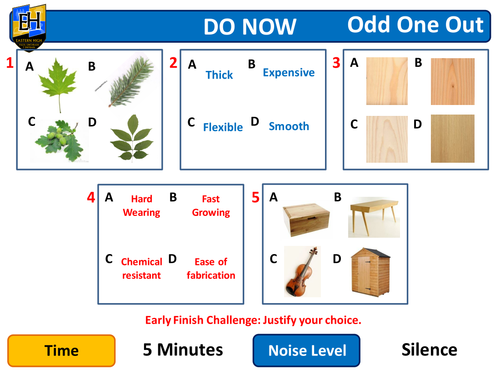
Lesson to meet requirements for teaching limitations and defects in wood to help pupils make informed choices when selecting timber.
Common defects of wood. (5min) Class
Teaching method: Introduce, pupils investigate, mini whiteboard to recall facts.
Rational: Introducing new vocabulary.
Line of questioning: When selecting wood, why is important to look for defects?
mini whiteboard: Progress check
Grading wood (5 min) Pair
Teaching method: Demonstration, Questioning,
mini whiteboard: Progress check
Rational: Make informed decisions, check progress
Selecting Wood (15 min) Pair
Teaching method: Facilitate pupils investigation, provide factsheets, pupils to record information found through scanning, circulate to guide pupils. Model scanning method.
Rational: literacy focus to develop pupils lit skills, pupils need the information to make informed choices, working in pairs to support each other.
Consolidating Information (10 min) Silence
Teaching method: Open question – ‘When selecting a wood species for a product what do pupils have to consider before committing to the material?’
Rational: Pupils to answer an assessment of learning question using as much detail as possible. Consolidating learning from this and previous lesson.
Learning Leading to
Pupils will have to select and justify materials for their products, they have to state what needs to be considered and how the materials they select can be quality checked and finished to achieve a good result.
Extension activity and Stretch it (10 minutes) Individual
How wood is graded. Pupils to investigate how wood is graded and what information they would find from a piece of wood graded wood.
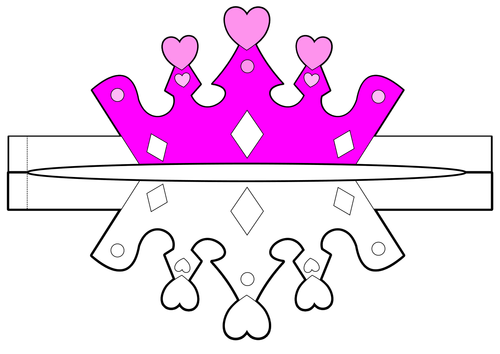
Colour in, Cut out and stick togethr these Pirates and Princesses Hats (Key stage 1 Art and DT)
I designed these for my kids craft party to colour cut out and wear, might be useful to someone.
This lesson follows on from the revision of a designer lesson in my resources. The reasonong behind the lesson is to reiterate the work of the designer but to also focus on some sketching skills and design thinking. There are 3 tasks.
1 Practicing sketching - Straight lines, Curves, Ellipses, Perspective, Coverging lines
2. Practicing shading and contering
(if you are not great at product design then I suggest you use this video from you tube https://www.youtube.com/watch?v=r-UqGtsjKiU )
3. Design a clock using sketching skills in the style of Phillipe Stark
There are some visual images that you can use for inspiration as well.
Not my greatest resource but could come in handy
Here is a fun game quiz you can play with a class divided into 2 teams.
There are 8 rounds, 5 questions per round.
1: Picture reveal (Who's hiding behind the tree)
2: Reindeer Race (Pick a reindeer to win the race)
3: Christmas quiz (Christmas questions)
4: Ding Dong Dingbats (What is the carol from the picture)
5: Pixelated picture reveal (What is the city?)
6: Whats the Punchline (The worst cracker jokes)
7: Whats in the present (Crack the code)
8: Elf on the shelf (Rhyming names)
See the youtube video for a snipit of each round
Link to video
https://www.youtube.com/watch?v=fWvIaVsjnko
Suitable for ages 8 - 16
Here is a scheme of learning for a Design and Technology unit that aligns with the principles of the Curriculum for Wales. This Scheme of Learning (SOL) has been carefully crafted to be accessible for delivery by a non-specialist teacher in a general-purpose classroom over the course of a term. It provides a clear outline of the learning objectives, detailing the rationale behind the selected activities. Additionally, the scheme integrates essential skills, encourages critical thinking, and addresses common misconceptions. It includes prerequisite knowledge, comprehensive assessment rubrics, lesson overviews, and a curated list of key vocabulary to support both teaching and learning throughout the unit.
This worksheet is designed as a fun and educational activity to help students understand how and when to use apostrophes correctly. It is perfect for a cover lesson or busy task where students can work independently or in small groups.
What It Covers:
Introduction to Apostrophes:
The worksheet starts with a brief, student-friendly explanation of what apostrophes are and their two main uses—showing possession and replacing missing letters in contractions.
It covers key aspects of apostrophes: contractions, possessives, and common mistakes (like using apostrophes in plurals).
It is a self-explanatory resource, requiring minimal teacher intervention—perfect for independent work during a cover lesson.
The activities are flexible and can be completed individually or in pairs.
This worksheet will help students strengthen their understanding of apostrophes while offering them an enjoyable way to practice their skills.
Lesson: Homophones - There, Their, They’re, Were, Where, Wear, and We’re
Learning Objective:
By the end of the lesson, students will understand the correct usage of the homophones There, Their, They’re, Were, Where, Wear, and We’re. They will be able to confidently identify and apply these words in sentences, recognizing their different meanings and contexts.
Lesson Overview:
This lesson introduces students to commonly confused homophones—There, Their, They’re, Were, Where, Wear, and We’re. Through engaging activities, including fill-in-the-blank exercises, rap-style puzzles, and group discussions, students will explore how these words differ in meaning and usage. The lesson will begin with a clear explanation of each word’s definition, followed by interactive practice. The session will conclude with a creative writing task, where students use these homophones correctly in short stories, sentences, or lyrics.
Learning Outcomes:
Students will be able to define the homophones There, Their, They’re, Were, Where, Wear, and We’re.
Students will be able to identify the correct homophone in context.
Students will use the homophones accurately in both written and spoken tasks.
Students will demonstrate their understanding by completing creative and structured exercises using the correct form of the homophones.
In this lesson, students will explore adjectives and their two main roles: attributive (before the noun) and predicative (after the noun). Through a combination of direct instruction, guided practice, and peer interaction, students will deepen their understanding of how adjectives modify nouns and enrich sentences.
The lesson begins with a quick-start activity to recall prior knowledge, followed by an engaging visual explanation of adjective use. The main task includes a worksheet with real-life sentence examples, allowing students to practice identifying adjectives in different positions. Interactive tasks encourage collaboration and active learning, while peer review promotes reflection and discussion. The lesson closes with a mini-task and a plenary to consolidate key points.
This well-rounded approach ensures that students grasp the concepts and can confidently use adjectives in their writing.
Renewable and Non-Renewable Energy in Product Design
Design and Technology – Product Design
Lesson Length:
1 Hour
Lesson Overview:
This lesson introduces pupils to renewable and non-renewable energy sources and their importance in product design. Pupils explore how different energy sources impact the environment, product function, and consumer appeal. The lesson encourages pupils to make informed design decisions by understanding the advantages and disadvantages of using renewable and non-renewable energy in the development of products.
Learning Objectives:
Understand the differences between renewable and non-renewable energy sources.
Explain how energy sources impact product design decisions.
Explore how renewable energy can be incorporated into product designs.
Learning Outcomes:
All pupils will be able to recall examples of renewable and non-renewable energy sources.
Most pupils will be able to explain the advantages and disadvantages of using renewable and non-renewable energy in product design.
Some pupils will be able to design a concept product that incorporates renewable energy or demonstrates sustainable energy use.
Lesson Includes:
Scaffolding Information:
➤ Clear, student-friendly explanations of renewable and non-renewable energy, their impact on the environment, and their relevance in product design.
➤ Real-life examples of products that use renewable energy sources.
Main Tasks:
➤ Task 1 - Recall
Pupils recall the different energy sources and definition of non renewable and renewable energy
➤ Task 2 - Explain
Advantages & Disadvantages T-Chart: Pupils compare the pros and cons of renewable and non-renewable energy in product design.
➤ Task 3 - Create
Design a Sustainable Product: Pupils design a product powered by renewable energy, sketch it, label its features, and explain how it helps the environment.
Plenary:
➤ Quick review questions to check understanding and consolidate learning.
Supporting Resources:
Visual aids: images of renewable and non-renewable energy sources.
Example annotated product design sketches:
Solar-Powered Garden Light
Wind Turbine-Powered Radio
Solar-Powered Security Camera
Solar-Powered Backpack
Design brief prompt for Task 3
Quality Assurance in Manufacturing
Year Group:
Year 10 – Year 11 Product Design
Lesson Length:
1 Hour
Lesson Type:
Independent study Structured learning ( no practical work)
Lesson Aim:
To understand how quality assurance systems help ensure that products are fit for purpose and meet required standards before reaching the customer.
Learning Objectives:
Define the terms quality assurance and quality control
Identify systems used in quality assurance
Describe how these systems are used in real-life manufacturing processes
Understand the difference between proactive and reactive approaches to quality
Lesson Activities Include:
Hook question: “Have you ever bought a product that broke easily?”
→ Encourages reflection and sets up the importance of quality control.
Key Concepts Covered:
Difference between proactive (QA) and reactive (QC)
Definition and purpose of quality assurance systems
Explanation of repair, replacement, and refund processes and their cost to manufacturers
Examples of QA in Action:
Buying materials
Manufacturing components
Material defect checks
Assembly of components
Mind Map Activity:
Pupils complete a diagram identifying quality assurance systems at different stages (ordering, manufacturing, feedback, etc.)
Questions & Learning Checks:
Fill-in-the-blanks
True or false questions
Short written responses
Assessment for Learning:
Pupils answer 5 structured questions to show understanding of QA and QC.
True or false questions used as a quick learning check at the end.
Product Design Revision – Key Topics and Practice Questions
Description:
This revision resource supports students in revisiting six key areas of Product Design, each with a clear, student-friendly explanation and a set of tiered questions (Easy, Medium, Hard) to test understanding and encourage deeper thinking. Topics covered include:
Social and Ecological Impacts
How design choices affect society and the environment.
Smart Materials
Innovative materials that respond to external changes.
Standards and Legislation
Safety, quality, and legal requirements in product design.
Planned Obsolescence
Why some products are made to have a limited lifespan.
Life Cycle Analysis (LCA)
Evaluating a product’s environmental impact from cradle to grave.
User-Centred Design (UCD)
Designing products that truly meet user needs.
The resource can be used for independent revision, classroom discussion, homework, or formative assessment. It encourages recall, understanding, analysis, and evaluation supporting learners in preparing for written exams or coursework.